POS catalog visibility
Control which warehouse products and design collections appear in the POS browse catalog. Stock must still exist at the terminal’s warehouse for sellable inventory — visibility here is the catalog flag, not stock itself.
Who and where
- Roles: Stock, Admin
- Routes:
/pos-catalog— products, custom categories, design collections/pos-catalog/banner— POS catalog banners/pos-catalog/offers— POS catalog offers
- Nav: POS Catalog → Products / Banner / Offers
Prerequisites: Create a product, Stock and warehouses, optionally Collections, groups, and designs.
1. Open POS Catalog
- Sign in to Admin.
- Open POS Catalog → Products (
/pos-catalog). - Confirm title POS Catalog and copy about managing products, custom categories, and design collections.
- Use tabs: All | Standard | Custom | Designs.
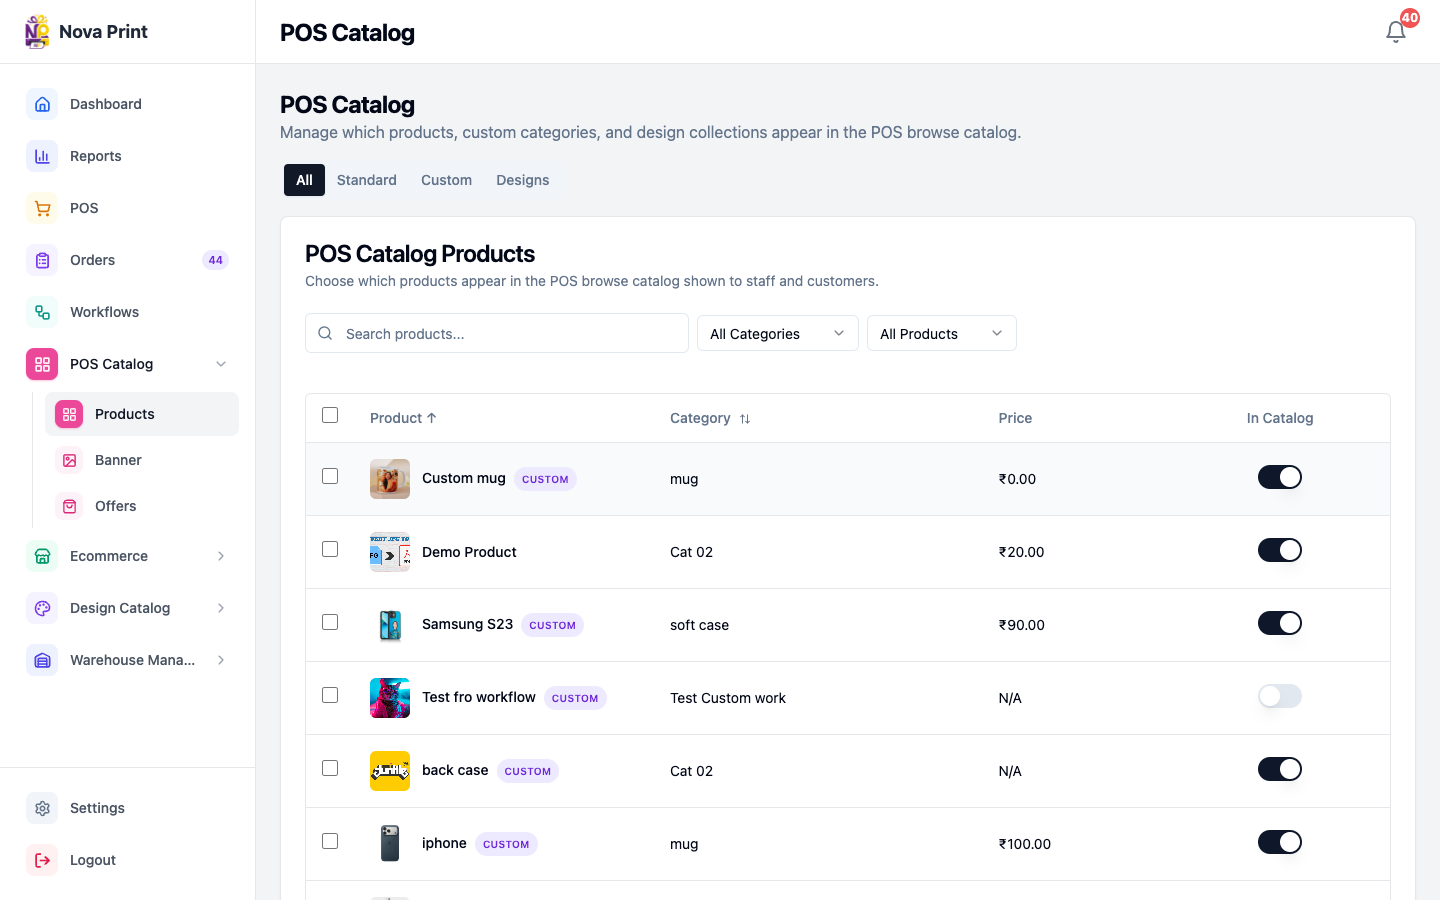
2. Show or hide products
On All / Standard / Custom product views:
- Filter with Search products..., All Categories, and All Products / In Catalog / Not In Catalog.
- Toggle In Catalog on a row (
show_in_pos_catalog). - Or select rows → Actions (n) → Add to Catalog / Remove from Catalog.
Titles change by context (for example Standard Products, POS Catalog Products, or {category} · Custom products).
3. Custom categories (bulk)
- Open the Custom tab area that shows Custom Categories (custom category table).
- Review status badges: All in catalog, None in catalog, Partial, Empty, plus Custom.
- Use Add all or Remove all for a category’s products.
- Use View products to drill into that category’s product list and adjust individual In Catalog switches.
4. Design collections on POS
Individual design Active flags live under Design Catalog. POS browse uses collection-level catalog flags:
- Open the Designs tab.
- Read the card: enable collections for POS browse; collections still need in-stock compatible products to appear for a store.
- Filter Search collections..., All collections / In catalog / Not in catalog.
- Toggle In Catalog per collection, or Enable selected / Remove selected.
Verify in UI: exact conditions for a single design to appear at a terminal (Active design, compatible stocked products, collection In Catalog).
5. Banners (optional)
- Open POS Catalog → Banner (
/pos-catalog/banner) — POS Catalog Banners. - Configure fixed hero positions (positions 1–5 mosaic).
- Provide an image and click Save Banner (image required).
Verify in UI for which slots are required vs optional on your build.
6. Offers (optional)
- Open POS Catalog → Offers (
/pos-catalog/offers) — POS Catalog Offers. - Click Add Offer.
- Set Offer Text, Icon, Show "New" badge, Active on catalog.
- Drag to reorder when multiple offers exist.
- Save per your UI (Verify in UI for save control if not inline).
Checklist
- Sellable warehouse products have In Catalog on.
- Custom categories bulk-added when cashiers need whole groups.
- Design collections cashiers should browse are In Catalog.
- Compatible products are stocked at the POS warehouse.
- Banner/offers updated only when marketing asks for catalog chrome changes.